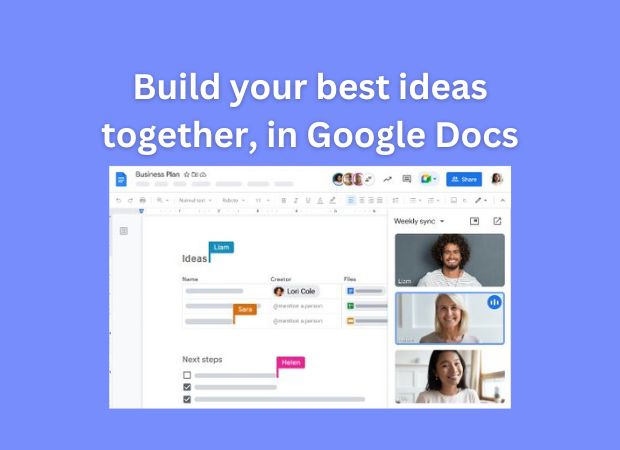
Google Docs is an online-based free dynamic and versatile Google tool, which plays an important role for both personal and professionals. This cloud-based application is accessible from any device with an internet connection. This cloud-based application offers many benefits for creating and managing documents.
What benefits do you get in Google Docs?
Google Docs is the best platform for teamwork. Multiple users can edit a document simultaneously, also perfect for group projects and team reports.
Being cloud-based, Google Docs keeps your documents free from any particular device. Whether you’re a student working from home or a professional on a business trip, Google Docs provides the ability to access files anytime, anywhere.
The platform’s version control and history features act as a safety net. You can use its complete services for free by signing up with your email. Track changes to your work, revert to previous versions, and ensure editing
For students, Google Docs facilitates collaboration on group projects. Accessibility of documents from different devices provides flexibility in student-to-student study environments. Real-time editing and commenting features enhance active communication, and make group assignments easy and live
In a professional environment, collaborate on any of your official reports, proposals, and presentations in Google Docs. Also ensures real-time document sharing and project editing progress Integration with other Google Workspace tools, such as Sheets and Slides, greatly improves any of your official work.
Today, Google Docs has emerged as an essential tool for online file sharing, professional publishing reports, real-time documents. Which provides convenience, collaboration and efficiency in integrated document management in both academic and professional landscapes.
Go to Google Docs
Install Google Docs
How to create a document and invite others to collaborate on writing projects
Here is Step-by-Step Guideline: create a document and invite others to collaborate on writing projects.
Create a Document and Invite Collaborators:
a. Open Google Docs: Go to [Google Docs](https://docs.google.com/) and sign in to your Google account.
b. Start a New Document: Click on the “+” button to create a new document.
c. Title Your Document: Give your document a relevant title by clicking on “Untitled document” at the top-left corner.
d. Share the Document:
Click on the “Share” button in the top-right corner.
– Enter the email addresses of collaborators in the “Share with others” box.
– Set their access permissions (view, comment, or edit) and click “Send.”
e. Collaborators Receive an Invitation: Invited collaborators will receive an email notification and can access the document via the link provided.
Utilize the Comments and Suggestions Feature:
a. Highlight Text: Select the text you want to comment on or suggest changes to.
b. Click on the Comment Icon: In the toolbar or right-click menu, choose the comment icon (speech bubble).
c. Add Comments: Type your comment or suggestion in the comment box that appears on the right.
d. Resolve or Reply to Comments: Collaborators can resolve comments when the issue is addressed or reply for further discussion.
e. Track Changes: Use the “Suggestions” mode to make edits that are suggested rather than directly implemented.
f. Notifications: Collaborators receive notifications for new comments, allowing for real-time communication.
g. View Comments Sidebar: Click on the comment icon in the toolbar to open the comments sidebar for an overview.
h. Finalize Changes: After collaborative editing, finalize the document by accepting or rejecting suggestions and resolving comments.
i. Version History: Track changes and revert to previous versions if needed by accessing “Version history” under the “File” menu.
Now you have successfully created a collaborative document and used the comments and suggestions feature to facilitate effective teamwork and editing.
How Prepare meeting agendas in Google Docs, and share with participants
Step-by-Step Guide: Meeting Agenda and Minutes in Google Docs
- Prepare Meeting Agendas:
a. Open Google Docs: Go to [Google Docs](https://docs.google.com/) and log in to your Google account.
b. Create a New Document: Click on the “+” button to create a new document.
c. Title Your Document: Give your document a descriptive title, such as “Meeting Agenda – [Date].”
d. Outline Agenda Items: Use headings and bullet points to outline the agenda items for the meeting. Include topics, discussion points, and any necessary documents.
- Share the Agenda:
Click on the “Share” button in the top-right corner.
– Enter participants’ email addresses in the “Share with others” box.
– Choose their access permissions (view or comment) and click “Send.”
e. Collaborators Receive Invitations: Participants receive email invitations and can access the agenda document through the provided link.
How use the same document to assign action items, and track progress.
- Open the Agenda Document: Before the meeting, open the agenda document in Google Docs.
- Prepare for Minute Taking: Create a section at the end of the document for meeting minutes, action items, and progress tracking.
- During the Meeting: As the meeting progresses, record discussions, decisions, and action items in real-time under the designated sections.
- Assign Action Items: Clearly outline action items, responsible parties, and deadlines.
- Use Bullet Points and Formatting: Organize minutes with bullet points, headings, and formatting for clarity.
- Track Progress: Update the document with progress updates and any changes to action items during the meeting.
- Collaborative Editing: Participants can access the same document simultaneously, facilitating real-time collaboration.
- Review and Save Changes: At the end of the meeting, review the minutes, make any necessary edits, and save the changes.
- Share Final Minutes: Share the finalized minutes with participants by providing access or sending them a copy.
- Version History: Track changes over time using the “Version history” feature under the “File” menu.
Now you have successfully prepared meeting agendas, shared them with participants, and used the same document for taking minutes, assigning action items, and tracking progress during the meeting.
How create professional-looking resumes or CVs using Google Docs templates.
A great job interview can change your life. But getting a job interview might not be that easy if your CV doesn’t impress the employer. Job seekers need a good resume that will put you ahead of the curve in getting a job interview.
Alright, imagine you’re trying to make a really cool resume to show to future bosses. Google Docs can make it super easy for you. Here’s how:
- 1. Open Google Docs: Go to Google Docs. It’s like a fancy online place where you can make documents. Just type “Google Docs” in your internet search and click on it.
- 2. Pick a Resume Template: – Once you’re in Google Docs, click on the “+” sign to create a new document. – Instead of starting from scratch, go to the “Template Gallery” (it’s like a collection of cool pre-made designs) and look for the “Resume” or “CV” category.
- 3. Choose a Design You Like: Browse through the templates until you find one that looks awesome to you. Don’t worry; you can change things later!
- 4. Fill in Your Info: Now that you’ve picked a design, start typing your details. Your name, contact info, education, work experience—basically, everything that makes you a superstar!
- 5. Customize and Make It Yours: You can change the colors, fonts, and even move things around to make it truly yours. Click on the parts you want to change, and you’ll see options pop up.
- 6. Save and Share: – Once you’re happy with your masterpiece, save it. Just click on “File” and then “Download” to save it as a PDF or another format you like. – You can also share the document with others if you want them to see your fantastic resume.
That’s the easy way You’ve used Google Docs to create a professional-looking resume without the stress of starting from scratch.
How to create a project plan or timeline using Google Docs tables and bullet points.
Imagine you have a big project coming up, like planning a birthday party or a school project. You want to make a plan so everything goes smoothly. Google Docs can help you do this easily.
- Create a New Document:
- Click on the “+” sign to create a new document. It’s like opening a fresh page to start your plan.
- Draw a Table for Your Plan:
- Think of a table like a neat and organized way to put your ideas. Go to the “Insert” menu, find “Table,” and pick how many rows and columns you want. This will be like your planning space.
- Label Your Table:
- Write important things at the top of your table, like “Tasks” in one column and “Timeline” in another. It’s like giving each part a name.
- Add Tasks with Bullet Points:
- Under “Tasks,” use bullet points to list all the things you need to do for your project. For example, if it’s a school project, list the steps you need to take.
- Plan Your Timeline:
- In the “Timeline” column, add dates or timeframes for each task. It’s like saying when you want to finish each part of your project.
- Customize and Decorate:
- You can make it fun! Change the colors, add emojis, or make things bold. It’s your plan, so make it look the way you like.
- Save Your Work:
- Don’t forget to save your plan. Click on “File” and then “Save” to keep your awesome project plan safe.
That’s it! You’ve just used Google Docs to create a project plan with tables and bullet points.
Google Form
Back in 2008, Google Forms began as part of Google Sheets, just two years after Sheets first showed up. Nowadays, making and handling forms is a breeze at docs.google.com/forms. You get templates and a handy spot to keep all your forms neatly organized. Google Forms is like a complete forms wizard that comes for free with your Google account.
You can use Google Forms to collect data for any personal or official work. Google Forms are very easy to design and create. . You can add questions about the task you want the Google Form to create. . You can add different types of questions, arrange them as you like and decorate the form using beautiful photos or colors.
How to create a Google Form
Making a form with Google is super easy. Here’s how you can do it:
1. Open Google Forms:
– You can start right from the Google Forms app. Just go to docs.google.com/forms. It’s like a special place for making forms.
2. Choose a Template or Start Blank:
– When you’re there, you can either pick a ready-made template if you want a head start, or you can start from scratch with a blank form. It’s your choice!
3. Access Google Forms from Docs, Sheets, or Slides:
– If you’re working in Docs, Sheets, or Slides, you can find a shortcut. Just click on “File,” then “New,” and finally, “Form.” It’s like telling Google you want to create something new.
4. Quick Form in Google Sheets:
– If you’re using Google Sheets, you can click on “Tools,” then “Create a Form.” This is cool because it automatically connects your form to your spreadsheet. So, when people fill out the form, the info goes straight to your spreadsheet without any extra work.
5. Start Asking Questions:
– Once you’re in, start asking questions. Click on the spots that say “Untitled Question” and type in your questions. It’s like having a conversation with people through your form.
6. Choose Response Types:
– You can decide what kind of answers you want. Do you want people to choose from options, write something, or maybe even pick a date? Google Forms lets you do all of that.
7. Customize Your Form:
– Make it yours! You can Change the colors, add pictures, and make it look cool. It’s like decorating your form to make it feel like you.
8. Save and Share:
– Don’t forget to save your form. Click on “File” and then “Save” to keep your work safe. when you finished to design form, you can share the form with others to get their answers.
So, I think design and create a google form not hard work. Now you can make forms for anything you want!
Create newsletters in Google Docs using Utilize tables, images, and hyperlinks
Creating newsletters in Google Docs becomes a seamless endeavor when one strategically employs tables, integrates captivating images, and incorporates interactive hyperlinks. By utilizing these features, the newsletter not only gains a visually appealing structure but also becomes an engaging platform for sharing information with the audience. Tables assist in organizing content with precision, images add vibrancy, and hyperlinks enable effortless navigation, collectively enhancing the overall quality and effectiveness of the newsletter.
Set Up Your Document:
Give your document a title –something like “Get Newsletter 2024.” This helps you stay organized.
Insert a Table:
Tables are like neat little boxes that keep everything tidy. Click on “Insert” in the menu, then “Table,” and choose how many rows and columns you need. This will be the layout for your newsletter.
Add Content to the Table:
Now, start typing your newsletter content into the cells of the table. You can have different sections like “Headlines,” “Updates,” or “Events.”
Insert Images:
Spice up your newsletter with some pictures. Click on “Insert” again, then “Image.” You can add pictures from your computer or even search for images right there.
Arrange and Resize Images:
Click on an image to resize it or move it around. Make sure it fits well within your table cells for a clean look.
Create Hyperlinks:
If you want people to visit websites or email addresses mentioned in your newsletter, use hyperlinks. Highlight the text, click on “Insert,” then “Link,” and enter the web address or email.
Customize Fonts and Colors:
Make your newsletter eye-catching by changing fonts and colors. Highlight the text, go to the toolbar, and choose your preferred styles.
Review and Edit:
Before sharing, review your newsletter. Check for typos or anything you want to change. It’s always good to have a fresh pair of eyes!
Save and Share:
Once you’re happy with your newsletter, save it. Click on “File” and then “Save.” You can share it by clicking on the “Share” button, and others can view or edit it.
There is a lot of discussion about what and how you can do in Google Docs. Also in Google Docs, the possibilities extend beyond basic document creation. One of its powerful features is the ability to create interactive guides and manuals that enhance the learning experience. By including hyperlinks, bookmarks, and document outlines, users can seamlessly navigate through information, making content more engaging and accessible. Using images and videos makes the learning process richer and more interactive.
Data analysis and reporting can become efficient with Google Docs tools Using tables and charts, detailed reports can be created by creating a visually appealing presentation of data. Google Docs features live updates, so information stays current and dynamic.
Event planning is an interesting collaborative feature of Google Docs. From checklists to guest lists and schedules, the platform offers comprehensive planning facilities. Sharing these documents with the event team ensures coordination of work, enabling them to contribute to the success of any event.
For language enthusiasts, Google Docs also provides a versatile platform as a language learning journal Users can create vocabulary lists, write grammar notes and engage in language practice in Google Docs. A user-friendly interface and collaboration features for continuous learning and improvement make it an ideal platform for language learners to enroll themselves.